Ah, quarantine baking adventures. It seems to have become a necessity for some and a part-time hobby for others.
Baking is a great skill to learn and a wonderful way to kill time while getting a reward at the end… Fresh food that you can sometimes no longer find at the store, or in the quantities you desire.
Where did all the Bread go?
Is Making your Own Cost-Effective?
In early pandemic days once toilet paper, the commodity of choice at the grocery store was no longer available, people seemed to move onto other things like tomato sauce and bread. I remember being in the store and laughing to myself that I luckily snagged two loaves before the racks were completely empty. Apparently some would rather starve then eat whole wheat bread.
I managed to get some flour from a family member who didn’t need it, but soon realized my yeast was two years old and no good. So yeah, obviously I hadn’t baked bread in a while, you can lump me in with all the COVID bakers. It wasn’t entirely new to me though, I have made plenty of bread in the past.
The next time I went out to the store, yeast was of course nowhere to be found either. I asked a few friends to check when they were in various stores – none to be found! I checked online as well and it seemed to be out of stock everywhere. All I could think was that people must be baking a ton of bread suddenly!
Keep reading if you’d like to bake your own bread at home and don’t have yeast, otherwise you can skip down to the bottom if you’re just curious if baking bread at home is cheaper that buying bread from the store.
Up for a Challenge?
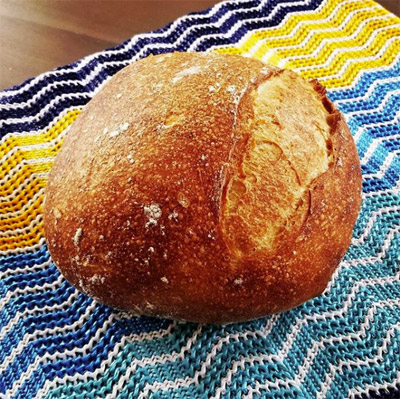
Honestly, it sounded a little sketchy to be growing fungus in a jar on my counter for a week. Then throwing the fermented goo it into a pile of fresh flour. The wild yeast seemed like something you’d concoct in prison, if bread was considered contraband but you needed some way to acquire it.
Further reading quickly satisfied me that this is the way bread had been made 100’s of years ago before instant yeast was around and that nobody would become violently ill from consuming the resulting loaf.
Sourdough Bread
If you want to make your life difficult and possibly waste some of your precious quarantine flour, start off by trying to make sourdough bread.
It’s quite an involved process, requires patience and is not for the faint of heart. Expect some disappointments in the beginning and along the way. You can make a loaf over the course of a day, but it’s usually a 2-day process (not including culturing your yeast for 7 days first). You can also create a variety of breads with different types of flour and the addition of fancy (or not so fancy) things like sesame seeds. I just went with a basic white flour bread to start off with, and here’s how I went about it after some Internet instruction.
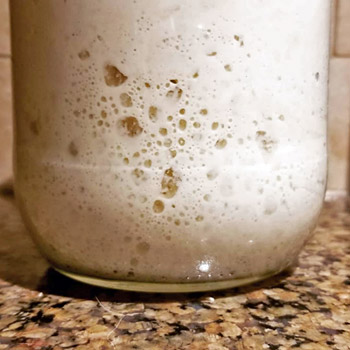
To create a sourdough starter is actually very simple. Get a clean glass jar with a lid and combine flour and water, that’s it! You want about twice as much flour to water ratio by weight. Using weight is more accurate, but you could do 1/2 cup of flour and 1/4 cup of water as an example and it should work fine. Once combined, stir together until it’s mixed well and let it sit for a day at room temperature with the lid on your jar, but not completely tightened or sealed.
On day 2 repeat the exact same process. By day 7 you should see some bubbling action from the yeast and should see the starter “growing” after you feed it new flour and water in the morning. Once you’ve got your starter going and it’s “activated” you can actually remove about 3/4 of it before you feed it and put in the new flour and water and it will rise just as well. There are much more thorough instructions online if you look.
Once you have your bubbling and growing yeast, you are ready to bake bread. This will replace your “instant yeast” or active dry yeast. I won’t try to explain this in detail, you can get way better instructions here from Mike @ Pro Home Cooks. My method loosely followed that procedure and I came up with my own approximate measurements as I don’t own a food scale (yet).
Here is my ingredients list:
– 3 Cups Flour (bread flour is probably better if you can find it)
– 1 ⅔ Cups of Water
– ¼ teaspoon of Salt
– About two heaping spoons of your Sourdough Starter Yeast
That’s it!
First I mixed my flour and water together, just enough to get the ingredients combined, but not mixed that well. (it will be sticky) Leave that to sit overnight with some saran wrap over the bowl.
In the morning I added my Salt to the mixture along with about 55- 60 grams of starter, which should be about double the size or more it had been when you fed it before going to bed. You want the starter at it’s most active state when adding it in. Mine worked out to about 2 good size spoonfuls according to an old postage scale. Begin to mix your starter and salt in.
The dough will likely be very wet and sticky, but you want to avoid adding more flour. I had to use a bit of trial and error to find the right stretching and folding technique, lightly grasping the dough with your fingertips and pulling it around the edges. Digging your fingers in there will just result in a big mess and half of the dough stuck on your fingers. You want to get a good loose mixture on the first go around, then let it sit in the bowl for about half an hour.
Repeat this process every 30 minutes, stretching and folder for 1-2 minutes and then leaving it to sit. Do this over the course of 2-3 hours, which means you should have stretch and folded 4 or 5 times total. Each time the dough should be getting more homogeneous and become stretchier. That is the gluten being activated. You will then let the dough sit in the bowl, covered for about 3 hours to rise.
Your dough should now be about 25% – 50% larger, but how much depends on your own environment, temperature and humidity. Taking the risen dough, you can now stretch and fold it some more and roughly shape it into a loaf on something like a cutting board. Then let it sit there for about 30 minutes.
After that’s done you’ll repeat that process again for the final ‘shaping’ of the dough. Ideally they would then go into proofing baskets or bannetons – which I don’t have either. I just used a bowl. The idea really is just to have something that will hold the shape of your loaf so it doesn’t start collapsing on the sides and getting flat. Once in the baskets/bowls or whatever you can find the loaf will sit to proof for another 2 hours. I did mention this was a lengthy process?
About an hour and 20 minutes into the final proofing I started to preheat my oven to 500 °F , so that gives it about 40 minutes to heat up and maintain temperature. The recipe I followed calls for a dutch oven and to have that in while preheating, but I ignored that since I don’t own one. I prepped a regular baking pan and just put foil over top with the intention of holding in moisture. You can do that as well as provide steam in the oven by having a separate baking pan with some water and soaked 100% cotton clothes or ice cubes to help steam up the oven. This keeps your crust crisp but keep the bread from burning and getting hard, while allowing it to rise longer.
Once your proofing is done and your oven is preheated, you can score your bread (fancy word for cut it across the top with a knife) to help it expand when baking. Pop that thing into the oven and let it bake for 20 minutes at 500° F. After 20 minutes, remove the foil (or lid from your dutch oven) and let it bake for another 20 minutes at 450° F. After taking the bread out of the oven, let it cool for at least 20 minutes. An hour would be even better for the best results and to lock in the flavours.
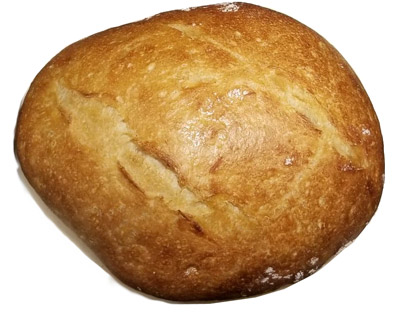
I’m clearly not a chef… but the results I achieved with my rough measurements and homemade dutch oven, I think were passable. The bread was at least edible. All photos here are my own breads!
So, is sourdough a cost effective way to make bread at home instead of buying some from the store? Heck no!!! The time involved in the whole process is completely uneconomical. That’s not to mention you will more than likely screw up a number of loaves before getting respectable or consistent results.
But that doesn’t mean it won’t be fun!
What about Plain White Bread?
So I established pretty quickly that making sourdough bread wasn’t going to save anyone money baking at home. I don’t even have to bother calculating the costs based on the amount of time involved. But what about a simple, easy white loaf?
Here is my simple white bread recipe:
– ¾ cup water (174g)
– ½ cup whole milk (125g)
– 2 teaspoons of active dry yeast (9 grams) OR 1 packet of instant yeast
– 3 cups of bread flour (440g)
– 1 ½ tsp of salt (8g)
– 1 Tbsp sugar (21g)
– 3 Tbsp unsalted butter softened (42g)
Wet Ingredients
I combine the water and milk and then microwave for about 30-40 seconds to get the temperature to about 100 °F. You can use a meat thermometer to check. Then add the yeast in, stir and let sit for about 10 minutes. This will get your yeast starting to activate. Sometimes I sprinkle in a touch of sugar as well.
Dry Ingredients
Combine your flour, salt and sugar into a bowl and mix together with a whisk so they’re combined well.
To make the Dough
After the yeast has been in the water/milk for ten minutes, add it to the dry mix and stir. Once combined well, start adding the butter in and mix some more. Knead the dough until it’s smooth and then shape into a ball and place in a bowl to let rise for about 1 – 1 ½ hours.
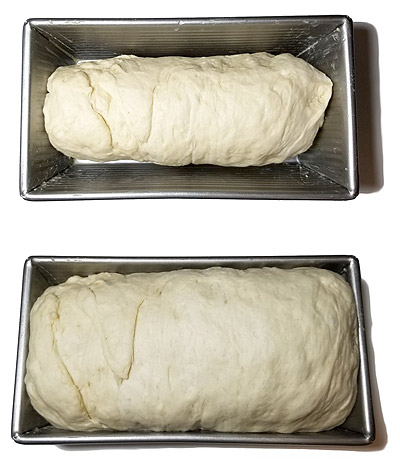
Once risen, punch your dough to release the gas and knead it lightly once more. Then shape into loaves and place in your bread pan(s) to rise a second time for about 40-50 minutes. After the second rise you are ready to pop them in the oven.
I bake mine for about 35-40 minutes (40 if there are two loaves in the oven.)
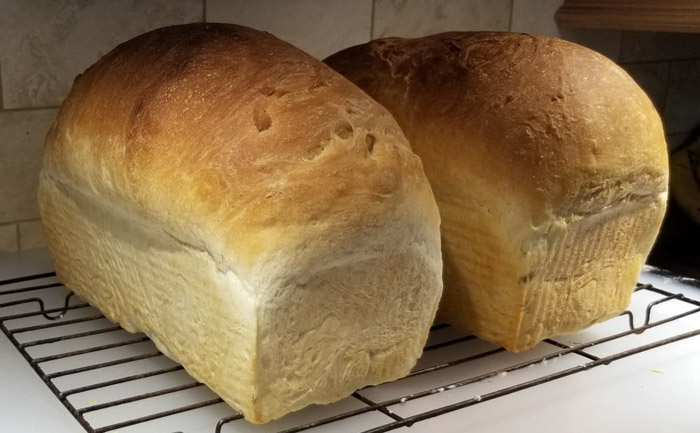
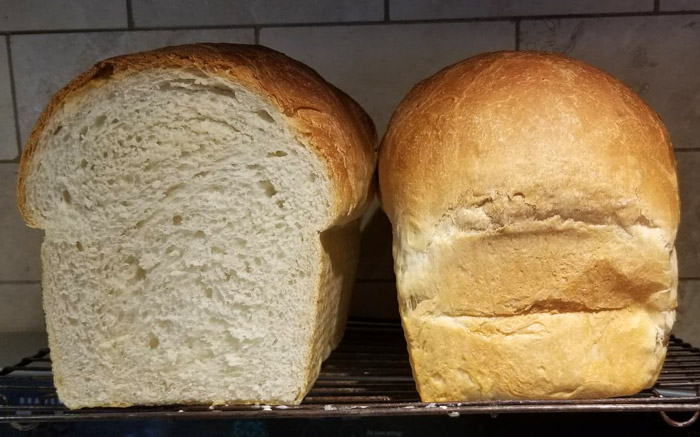
Here are the results of my White Loaf Adventures. Much easier and more predictable outcomes than the sourdough bread! I like to bake a couple at a time (or more) and then you can wrap one up and pop into the freezer to store for later. No preservatives mean they won’t last as long as your normal store-bought bread.
Pro tip – Keep the bags from your store bought bread to put your homemade loaf in, to keep it fresh longer!
Can you Save Money Baking Bread at Home?
Alright, so we’ve established that white bread is pretty easy. It has to proof for a couple hours, but the actual time spent mixing ingredients and kneading dough isn’t all that bad. So for arguments sake here, let’s remove time as a factor and just breakdown the ingredients cost for a loaf of white bread.
I’d say a store-bought loaf of bread in Canada is in the range of $1.65 to $3.79 depending on the bread and how fancy it is. Let’s use our benchmark white bread at $2.50 / loaf.
So how much does it cost to make a loaf at home?
| Ingredient | Cost metric | Total Cost |
|---|---|---|
| 1½ cup water | < 1¢ | $0.00 |
| 1 cup whole milk | $1.343 per litre | $0.795 |
| 4 teaspoons of active dry yeast (9g) | 7.7¢/100g | $0.139 |
| 6 cups of bread flour (880g) | 13.97¢/100g | $0.615 |
| 3 tsp of salt (16g) | 11.7¢/100g | $0.019 |
| 2 Tbsp sugar (42g) | 10¢/100g | $0.042 |
| 6 Tbsp unsalted butter softened (84g) | 88¢/100g | $0.74 |
| Electricity from Oven (2500 Watts) @40 minutes using | 1.666 kW @ 12¢/kWh | $0.20 |
| TOTAL COST (divide by 2 loaves) | Cost Per Loaf | $1.275 |
The Verdict?
I’d say if you take out the time factor (although it does take time to go to the grocery store too) then yes you can save a little bit of money baking your own bread. The other question would be, how good does your fresh loaf taste compared to the store-bought version and is it healthier? There’s nothing like the taste of a hot slice of fresh bread, plus how can you not like the aromas that slowly waft through your house. Just the fact that your kitchen can smell like a fresh bakery might be worth the extra time!
There is something to be said for creating your own food from scratch using your own ingredients, creating it how you like it and being proud of what you’ve done. That in itself adds to the enjoyment of eating. If your only goal is to a save a little bit of money, I’d say don’t bother with baking bread unless you’re doing large batches. If you’re looking for something fun to do with your family that is rewarding and delicious, I say give it a shot!
Other Bread Creations
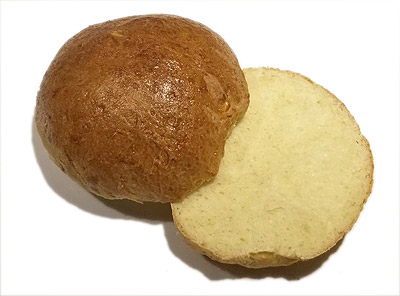
You can find a collection of even more cooking and baking ideas here.


Wowooo! Very impressive the sourdough looks so good. Your loaf of bread looks good too. I didn’t know you could make your own wild yeast.
I have been making air fryer brownies, a lot of muffins, some cookies and other non healthy foods.
I don’t think a lot of people knew that until the instant yeast suddenly disappeared.
I haven’t tried an air fryer yet and am hesitant. Sound like too much deliciousness to eat!